When adding the TwitchAuthenticationHelper to your GameObject, you need to configure it with the data you got from twitch. For this you must first create your application in the Twitch Developer Console and then edit it again to generate a new secret. Please also read our Best Practice as a full guide
Configuring the TwitchAuthenticationHelper
The way, how the authentication technically works, depends on the flow you are using, thus the fields to fill in vary between those implementations. First select a flow and then fill in the required information. You can find screenshots below which show what informaiton to put where as this can be a bit complicated if you never used OAuth/OIDC before.
Implementing Authentication
First you need to add a listener to the TwitchAuthenticationHelper.OnAuthenticationResult event. This event will fire after any authentication action - regardless if it is a fail or a a success (examine the isSuccessful and error fields of the delivered AuthenticationResult instance).
Next your code must create an AuthenticationRequest instance and pass it to TwitchAuthenticationHelper.Authenticate. This will start the selected authentication flow.
If AutoRefresh is enabled in the TwitchAuthenticationHelper's inspector, the game will now maintain the token and will also automatically re-authenticate the player after a game restart.
See also the Best Practice guide for a more detailed howto.
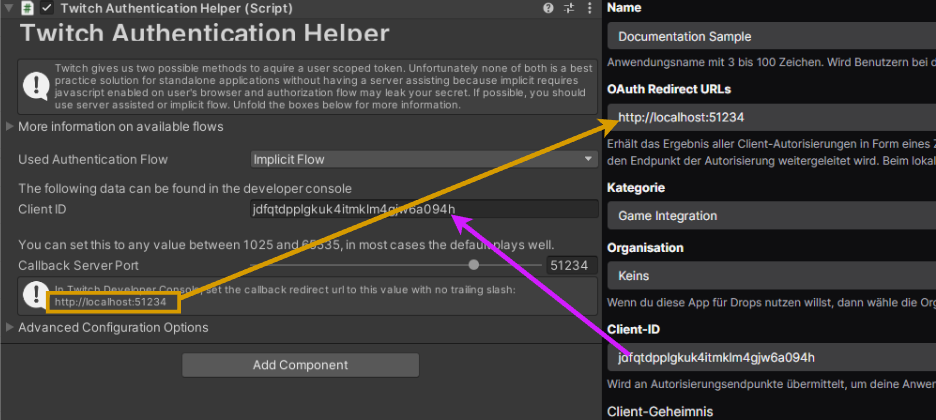
Implicit Grant
Configuration
In the inspector, insert the ClientID (displayed on twitch developer console) and fill the callback URL back into the dev console:
Technical flow
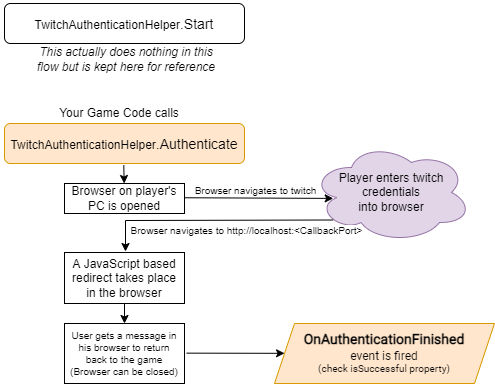
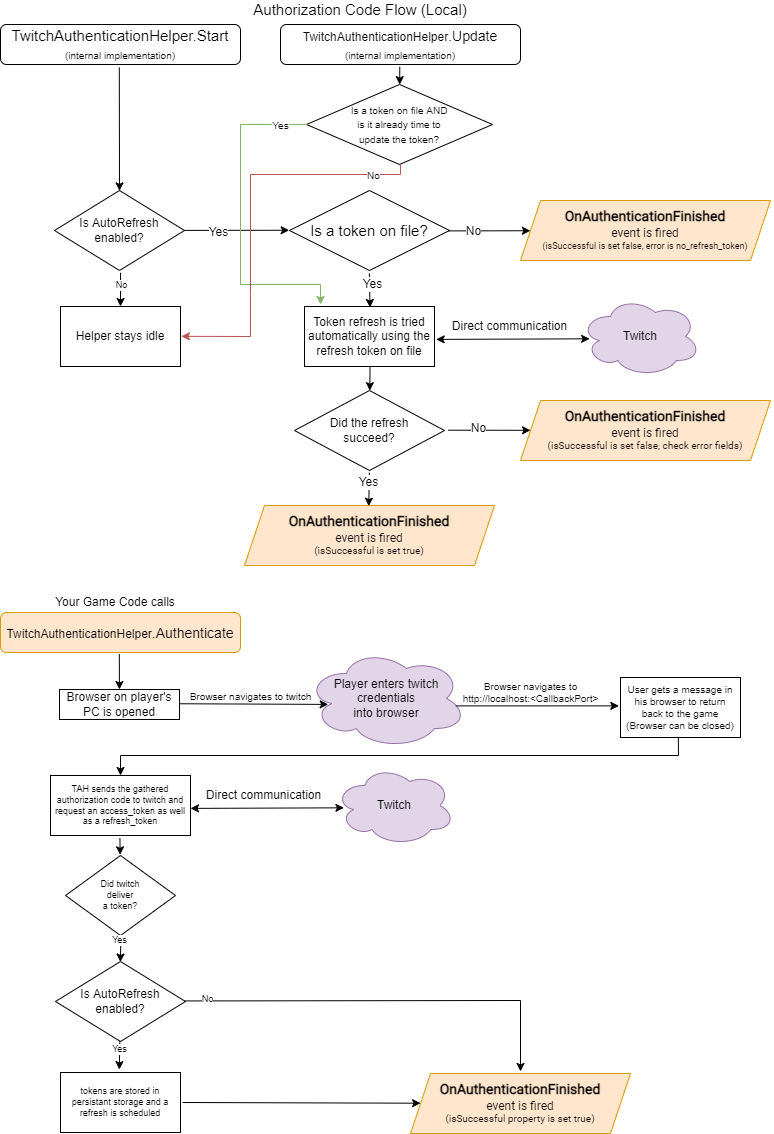
Authorization Code Flow (local)
Configuration
In the inspector, insert the ClientID (displayed on twitch developer console) and fill the callback URL back into the dev console:
Technical flow
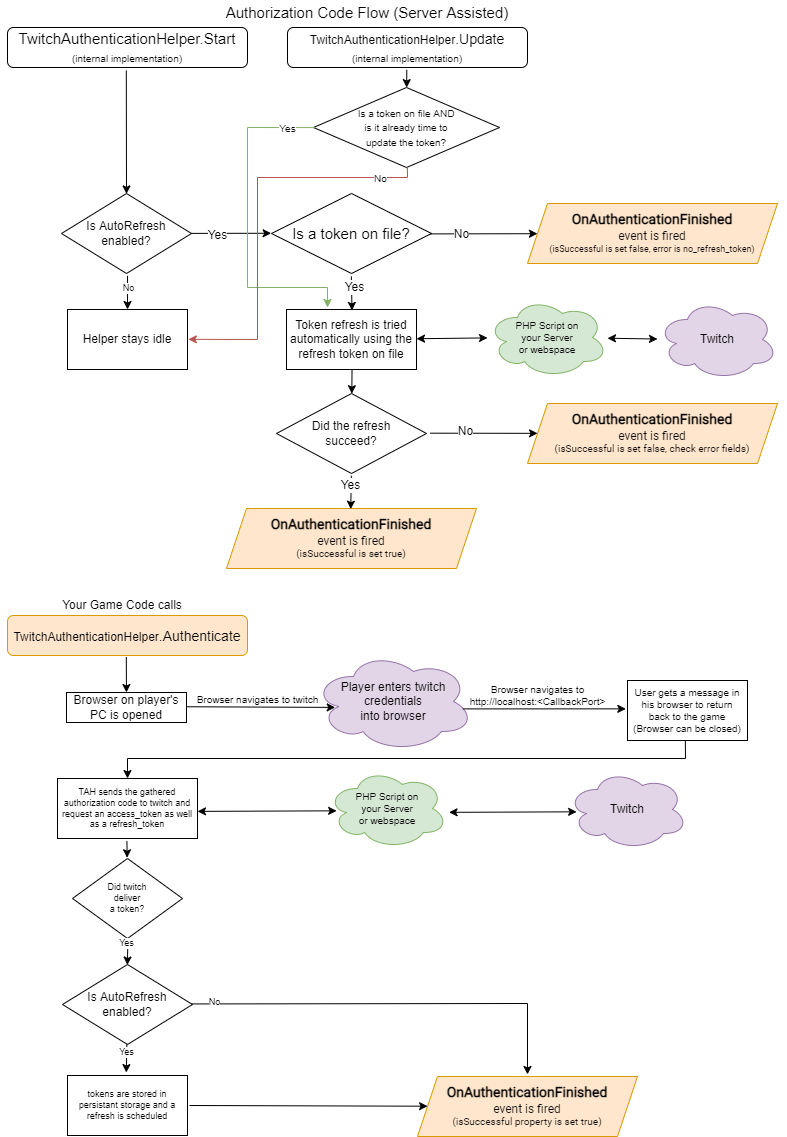
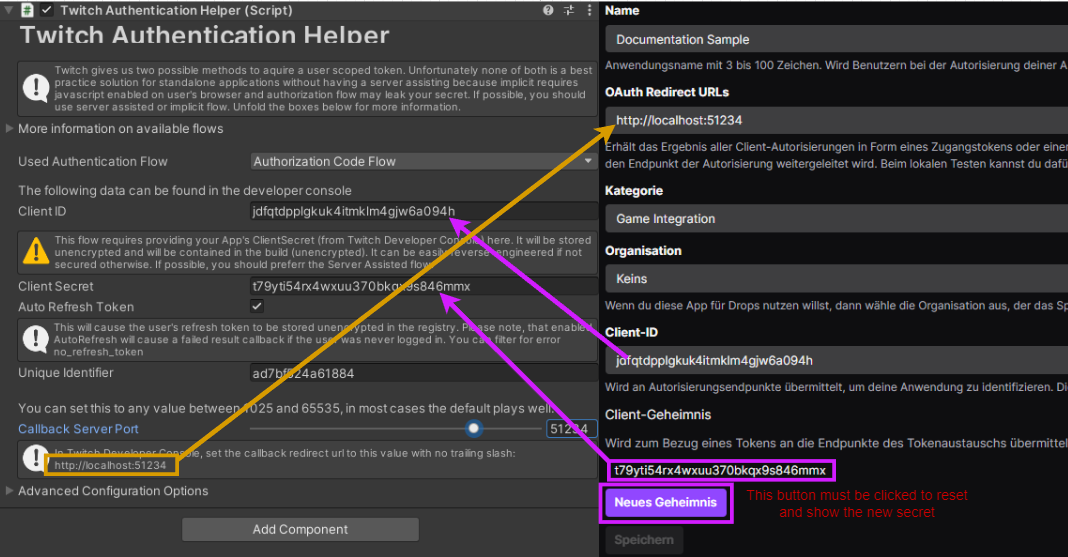
Authorization Code Flow (Server-Assisted)
Configuration
This is a more complex task, described throughly in our Best Practice Guide
Technical flow